
This page is for Extra Large PlexiDor dog doors manufactured before 2008. If your door is newer, please follow these instructions instead! Some of the parts needed are not included in the spring kits for sale, because they are intended for the newer doors.
Suggested tools needed:
- 6 inch needle-nose vise-grip
- 5/16″ nut driver
- 1/8″ Allen Wrench
Remove the interior frame from the house door or wall through unscrewing the four retaining screws and sliding the dog door out of the mounting hole.
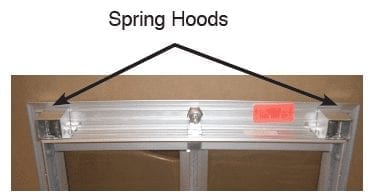
Remove the spring hoods by unscrewing the hex-head screws and lifting the hood over the rivet head.
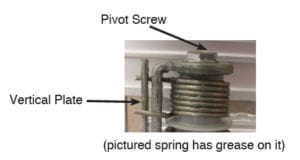
Remove the pivot screw that holds the bent arm in position, using a 5/16 nut driver. Remove the bent arm and spring.
 This is a good time to clean the frame. You can use warm water with Dawn to wipe it down. Cleaning it will make it easier to install the new springs, and it will ensure you don’t get dirt and grime in the new spring assembly.
Once all the parts of the old spring have been removed:
- Push the new pivot pin into the frame
- Put nylon tube spacer over the pivot pin
- Put the spring over the nylon tube spacer
- Put the metal internal tooth washer on top of the spring

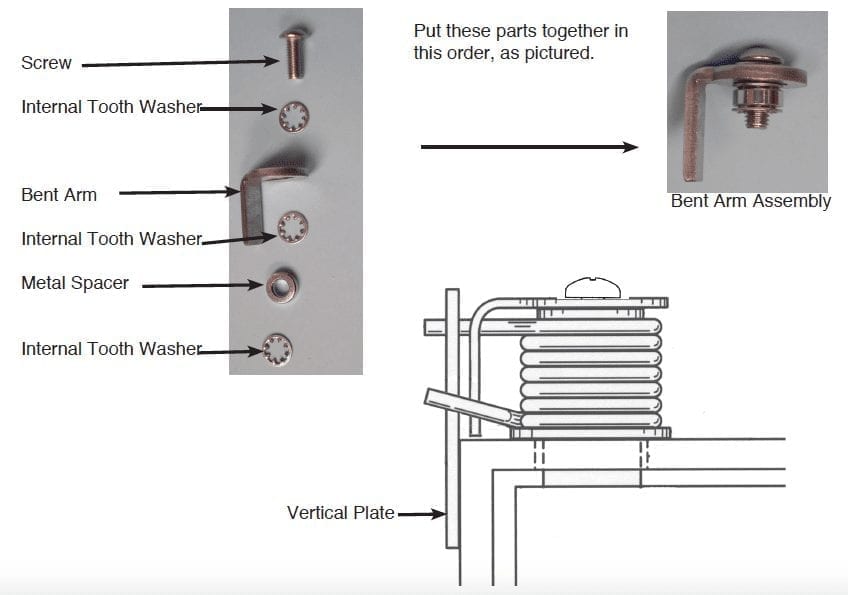
Put the new bent arm assembly parts together as pictured below:
The spring must be “charged” to close the door panels:
- Place the spring to the tail that points up slightly is on the bottom
- When you face the door, the slightly bent spring tail will be in front of the vertical plate on the left spring side. On the right side of the door, the slightly bent spring tail will be behind the vertical plate.
- Using a pair of small wire gripping pliers, grab the top spring tail, wind it around and hook it over the vertical plate
- If the new spring is too tall and the vertical plate isn’t tall enough to wrap the spring tail around, use a small flat-head screwdriver, place it under the end of the vertical plate, and tap the vertical plate gently upwards with a hammer until you have enough height for the spring
Put the new bent arm assembly on top of the spring and tighten with a 1/8 inch Allen wrench. It should be snug, but not over-tightened. Make sure to hold the panel centered while doing this, otherwise the door panels won’t center when closing.
Apply a coat of good quality grease to the springs. We recommend white lithium grease or marine grease. Do not use WD40.
Replace the spring hood and screw it in place. Do not over-tighten. The new spring should not touch the top of the spring hood, if it does, leave the spring hood off.
Reinstall the interior frame in the mounting hole and you are done.